Your engagement ring will get scratched regardless of how careful you are. The scratches can add to the beauty and story of the ring, but sometimes you may want to remove them. You can do that by polishing or re-plating.
To remove scratches from an engagement ring, sand it down and polish the sanded area with a polishing cloth like cape cod. In some cases, you can polish the ring without sanding. Other methods, such as replating, can also eliminate scratches and protect your ring from future scratches and dents.
This article will detail all the methods to remove scratches from an engagement ring, including the best low-cost tips you can do from home.
1. Polish Your Engagement Ring To Get Rid of Light Scratches

When you gently pass your fingernail across the surface of the ring and can hardly feel the scratches on your ring, consider those as light scratches.
To remove the scratches from your ring, you may need the following:
- A clean microfiber cloth
- Kitchen paper
- A toddler toothbrush
- Dishwashing soap
- Warm water
- Cape cod
- Your ring
Depending on the design of your ring, you may only require some material on this list. Before polishing begins, you need to make sure the ring is clean.
Thoroughly Clean the Ring
You must clean the ring to get rid of the dirt that accumulates on its surface and grooves to prevent it from getting more scratches during the polishing process.
Tiny dirt particles that accumulate between the ring grooves will scratch it. When the ring is dirty, the trapped particles between the cape cod and ring surfaces will scratch the ring surface with each rub.
To clean the ring:
- Make a mixture of warm water and dishwashing soap.
- With the toddler toothbrush and the warm water solution, gently scrub the ring’s surface, removing all the dirt from the grooves.
- Once your ring is free of dirt, rinse it with clean water to remove the soap.
- Dry off the ring using a clean microfiber cloth.
- Use a piece of kitchen paper to dry the sections like small corners that the cloth might have missed.
Polish the Ring
For polishing, you will need a cloth of cape cod. You can buy Cape Cod Metal Polishing Cloth from Amazon.com. It’s soft, reusable, and works on all fine metals.
Here’s the process to follow:
- Lay the cloth of the cape cod on a flat surface like a table.
- With the ring in a vertical wheel position, rub the surface of the ring up and down against the surface of the cape cod cloth until you see a black stain forming on the cape cod cloth.
- When the stain on the cloth makes it so smooth to rub the ring against, wipe down the surface of the ring that was in contact with the cape cod cloth with a clean microfiber cloth.
- Check whether rubbing with the cape cod eliminated the scratches on that part of the ring.
- Slightly rotate the ring to change the point of contact between it and the cape cod cloth.
- Repeat gently rubbing the ring surface against the cape chord surface until you see a black stain on the cape cod cloth.
2. Sand the Ring To Get Rid of Deep Scratches
Sometimes, your ring might get deep scratches from coming in contact with surfaces like concrete. Removing these takes more work, as using a polishing cloth may not help. When you pass your fingernails across a surface containing deep scratches, you can feel them too.
Here is how you get rid of them by sanding them down.
Gather Your Tools
- Rotary tool: You can use a tool like this Dremel Cordless Rotary Tool Kit from Amazon.com. You can also pick up even cheaper but equally efficient rotary tools from harbor freight.
- Cloth polishing wheels: These go with the Dremel rotary tool.
- Polishing rouges: You will also need to buy polishing rouges like this PMC Supplies Four-Pack of Dialux Compounds from Amazon.com. The pack should come with various colors because each rouge color represents a different design for a unique metal or group of metals. Yellow is for copper, bronze, and brass. Red is for gold, and green is for working with stainless steel, platinum, or other hard metals.
- Wet/dry sandpaper: The sanding process requires wet/dry sandpaper which comes in different grits, i.e., 600 grit, 1000 grit, 1500 grit, and 2000 grit. You can get all these options, but you’ll begin by using the one with the lowest grit so that you even out the areas that are scratched, and you progressively go higher until everything is light and uniform.
- Three-way nail buffer: This is just wet/dry sandpaper of different grits sandwiching a cardboard material. It will be helpful in sanding flat areas like the surface of the ring, but it would not be able to get work well in non-flat regions such as the curves or details of the ring, and this is why you would need a regular piece of wet/dry sandpaper. You could get a three-way nail buffer.
Professional Tip
When you use a cloth polishing wheel on one of the polishing rouges, don’t mix it with another one. If you use a cloth polishing wheel on a red polishing rouge, don’t use the same cloth polishing wheel on the green polishing rouge or any other color that is not a red polishing rouge.
Finally, keep the used polishing wheels in bags storing the same color.
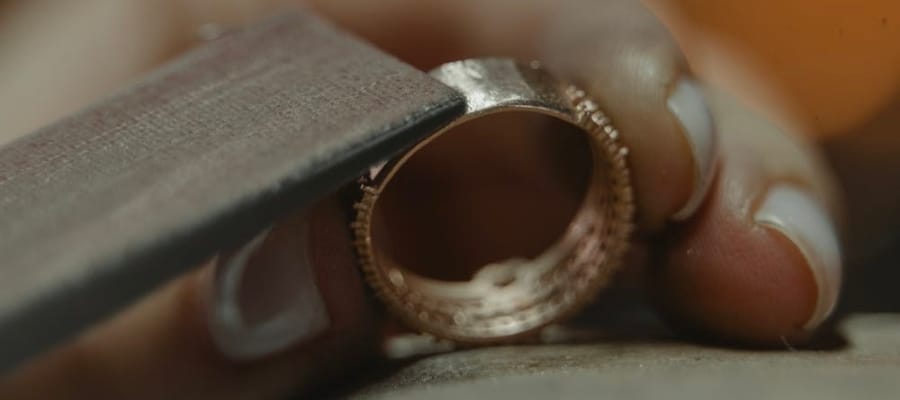
The Process of Sanding
- Get a three-way nail buffer and with the side that has the lowest grit, begin gently rubbing the three-way buffer against the surface of the ring that has scratches.
- The rubbing motion should be in a single direction, and the three-way buffer should be parallel to the contact surface to prevent damaging the ring or changing its form. Don’t rub back and forth, as this might damage the ring.
- After every few rubs, check to see if the scratches are still visible. If the scratches are still visible, just keep going.
- Make sure to follow the contours of the ring and don’t sand over any areas or details you don’t want to lose.
- Once the lower grit has achieved a uniformity that you are comfortable with, progressively switch to higher grits that are finer. These higher grits will make the scratches even finer.
- By the time you use the finest grit (2000 grit), you’ll barely hear any gritting sound but keep on rubbing the sandpaper until you notice an increase in the shine/luster of the area you are sanding down. At this point, you will barely see any scratches on the surface of the ring.
The Process of Polishing the Ring
This process is optional. Using a polishing rouge might create a mirror finish, but if you work on a surface with a brushed finish, you don’t need to apply a polishing rouge. If you use a polishing rouge, it will make the surface shiny with a mirror finish.
Follow this process if you want a shinier ring:
- Mount a cloth polishing wheel to the tip of the rotary tool. Make sure the wheel mounted is either new or the same color as the polishing rouge you will use.
- Turn on the rotary tool and set it to a relatively low speed.
- While the mounted cloth polishing wheel is rotating, place it on the polishing rouge to apply the polishing to the wheel. Don’t hold the wheel in one spot, as this will create too much friction between the wheel and the polishing rouge.
- Once some wax from the polishing rouge has been applied, with the rotary tool still rotating, gently move the cloth polishing wheel across the surface of the ring that’s to be polished. Gently apply a back-and-forth motion to the application process.
- Do this for a while so that you can polish and remove any other scratches that are still present on the ring.
- After a few minutes, apply less pressure to the ring surface, allowing the cloth polishing wheel to leave a clean surface behind. Keep going lighter until you see a shine.
- You then use a clean cloth to wipe the surface of the ring, and with this, you should have a clean and scratchless ring surface.
3. Replate the Ring

If you have an engagement ring made of white gold, the silver or white color will wear off over time. You will see this as your ring turns to a silver-yellowish shade, or it may lose its shine and have several scratches.
In this case, sanding down or simply polishing your ring won’t make it return its shine, which is why it needs plating.
In this case, you’ll need to carry out rhodium plating, as it works for all kinds of white gold, such as 10kt, 14kt, and 18kt gold. It restores their whiteness, as well as their shine, and removes scratches.
The rhodium plating process might take some time and effort, but here are the steps involved.
Polish the Ring
To polish the ring, you can either use machine polishing or hand polishing. Here’s how to do that:
- Use machine polishing like a Dremel rotary tool, which is ideal for use on small rings that are not delicate.
- If the ring is delicate, you’ll want to hand-polish it. You only need a light polish for these thin rings to remove the scratches, but this won’t be enough since this polish will remove the coated layer hence why replating will be required.
Thoroughly Clean the Ring With an Ultrasonic Cleaner
Using an ultrasonic cleaner will ensure the polish doesn’t harden on the ring. This process will require an ultrasonic cleaner, water, ammonia, and liquid dishwashing soap.
- Fill the tank of the ultrasonic cleaner with water and heat it, but don’t let it boil.
- Add 1 tbsp (14.3 g) of ammonia to it.
- Add a little dishwashing liquid soap to the solution.
- Switch on the cleaner and let it run for 10 minutes to allow the solution to mix thoroughly well.
- Switch off the cleaner and put your ring into the tank. Don’t put in multiple rings, as this may cause them to scratch each other.
- Switch on the cleaner and let it run for about 20 minutes to ensure that your ring is clean.
- Switch off the cleaner and wait for 5 minutes before you remove your ring to let the dirt settle.
- Remove the ring from the cleaner and rinse it with warm water to remove any detergent.
- Rinse the ring in distilled water, removing any unwanted soluble species that might be contaminants. By rinsing with distilled water, the ring will be free of contaminants.
Steam Clean the Ring
This method is only an option if you can’t use the ultrasonic cleaner for any reason. Steam cleaning will prevent the chemicals from damaging your ring, but it is also safer than using the ultrasonic cleaner.
To do this, you will need a steam cleaner like this Reliable 5000 CJ 2.5 liter steam cleaner or the Elmasteam 8. I will use the Reliable 5000 CJ because it is cheaper and easier to use.
Here’s the process:
- Fill your steam cleaner’s tank with 2.5 liters (10.6 cups) of distilled water measured in a container. Make sure you don’t go above this amount.
- Turn on the boiler and steam buttons and check the pressure gauge until it reaches 50 PSI which will take about 15 minutes.
- Once it’s finished, the boiler light will go off. Secure your ring and hold it with pliers to avoid getting your skin in contact with the steam.
- With the ring directly under the steam nozzle, step on the peddle and let the steam wash over the ring. Make sure you hold a container under the ring and nozzle to trap the excess water from making a mess on your floor.
- Do this for about 30 seconds, then wipe it clean and dry it with a cloth.
Electro-clean the Ring
To remove rouge, oils, and other contaminants left over during the polishing and earlier cleaning processes, we will need to electro-clean the ring. To do this, we shall need a stainless steel utensil, baking soda, iodized salt, a glass of warm water, and a 12-volt charger with alligator clips.
Here’s how to do that:
- Place 2 tbsp (30 g) of baking soda in a bowl.
- Grab a pinch of salt and put it in warm water. Stir the warm water until the salt dissolves.
- Get your alligator clips and clip the black clip, which is the ground, onto the stainless steel. Place the steel into the water.
- Clip the red alligator clip to the ring and place that ring into the water. Make sure that the ring is far away from the steel.
- Plug in the charger and switch on the electricity. Make sure you wait for two minutes, as this is how long it will take to remove the contaminants.
- Gently shake the ring while still in the water to remove the contaminants, take it out of the water and drop it into the baking soda.
- Completely cover the ring in baking soda by flipping it.
- With a clean cloth, gently start rubbing the ring to remove the baking soda and the contaminants.
- Keep dipping it in the baking soda and cleaning it until you are satisfied with the result.
- Rinse the ring in clean distilled water. This will get the excess baking soda off, leaving you with a clean ring.
Neutralize the Ring With an Acid Dip
For this section, we shall need an acid deep to neutralize the alkaline contaminants from the electro-cleaning part. We shall use the MIDAS acid dip for this. You will need a clean container, a steel utensil, distilled water, and a charger with two alligator clips attached.
Here’s the process:
- Mix 2 tbsp (30 g) of acid dip with one liter of distilled water and stir with the steel utensil to ensure the acid dip has dissolved.
- Clip the ring to the other alligator clip and dip it in the acid dip solution for 30 seconds.
- Rinse the ring in clean distilled water, but don’t use the water you used earlier to avoid cross-contamination.
Rhodium Plate the Ring
You will need a rhodium solution placed in a clean container, as well as a platinized titanium rod placed in the rhodium solution to act as the anode. You will also need red and black alligator clips connected to a rectifier.
Here’s the process:
- Set the rectifier to 4 volts and clip the black alligator clip to the anode.
- Suspend the ring to a copper wire and dip clip the alligator clip to the copper wire.
- Dip the ring in Rhodium solution for 30 seconds until bubbles form around the ring’s surface.
- Rinse in clean distilled water. Dip the ring in pure distilled water for 30 seconds to remove the excess rhodium deposits.
- Repeat the acid dip, as this neutralizes the excess rhodium contaminants.
- Rinse with clean water. Rinse off the acid solution by dipping the ring into clean distilled water.
- Dry the ring using a clean cloth, and there you have your ring with no scratches and a fresh new look.
Conclusion
Depending on the scratches on your ring, you have three options of varying complexity. While you can do the first two on your own, if your ring needs replating, take it to professionals, as this is a safer and cheaper option for most people.